Lockout tagout (LOTO) isn’t just policy—it’s protection. And when it comes to training, enforcement, and internal audits, pictures of lockout tagout procedures are often more powerful than words. A single image can clarify complex energy isolation steps, prevent misapplication of devices, and reinforce compliance across multilingual teams. In high-risk environments like manufacturing plants, chemical facilities, or electrical substations, misunderstanding a lockout procedure can lead to serious injury—or worse. That’s why visual documentation isn’t a luxury. It’s a necessity.
This guide dives into the most valuable types of LOTO images, their real-world applications, common errors revealed through visuals, and how to use them effectively across safety programs.
Why Pictures of Lockout Tagout Matter More Than You Think
Text-based procedures have limitations. Workers under time pressure may skip steps, especially if instructions are dense or poorly illustrated. But a well-placed image cuts through confusion.
Consider this: a maintenance technician approaches a conveyor system with multiple energy sources—electrical, pneumatic, and gravity-based. A written checklist might list isolation points, but a clear photo of the lockout setup shows exactly where locks and tags are applied, which valves are closed, and how energy dissipation is verified.
Visuals also play a critical role in training. New hires, temporary workers, or contractors unfamiliar with site-specific procedures can quickly grasp expectations when they see real-world examples. According to OSHA, up to 10% of serious accidents in industrial settings involve failure to control hazardous energy—many of which could be prevented with better visual communication.
Key Types of Lockout Tagout Pictures You Need
Not all LOTO images are created equal. The most effective ones serve a specific purpose: instruction, verification, or compliance auditing.
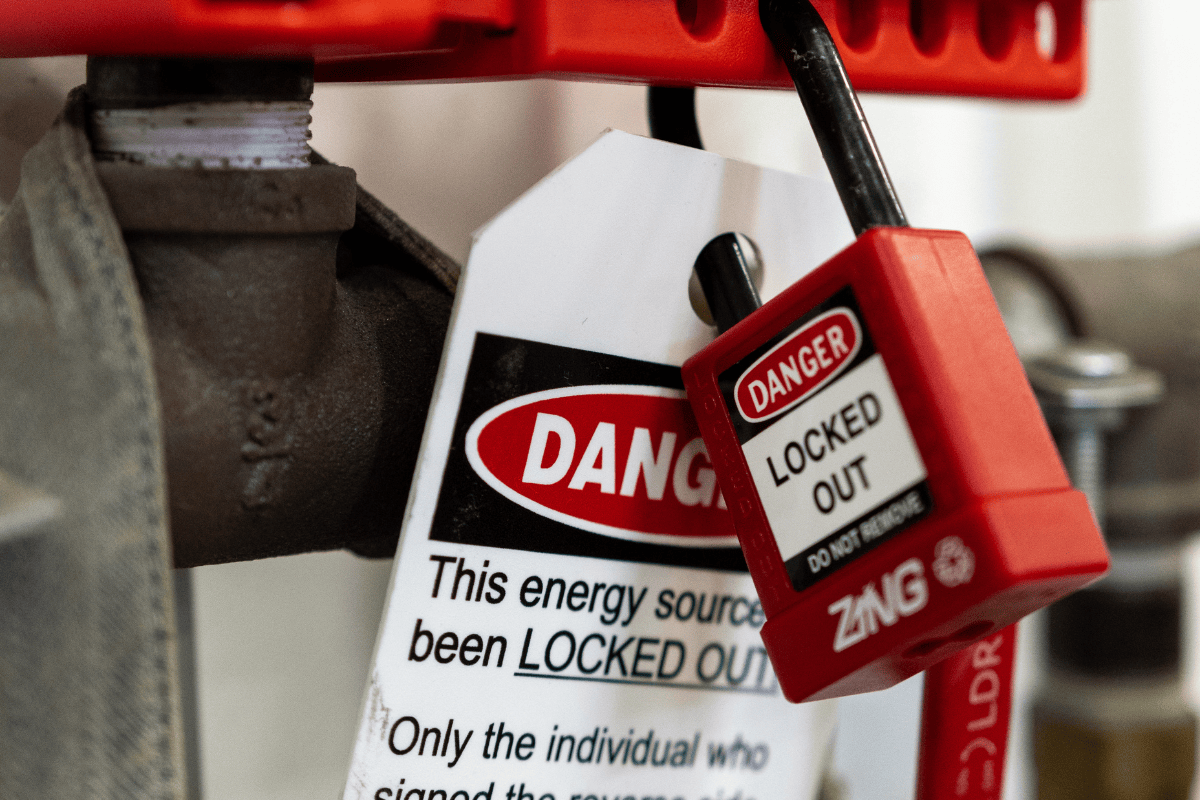
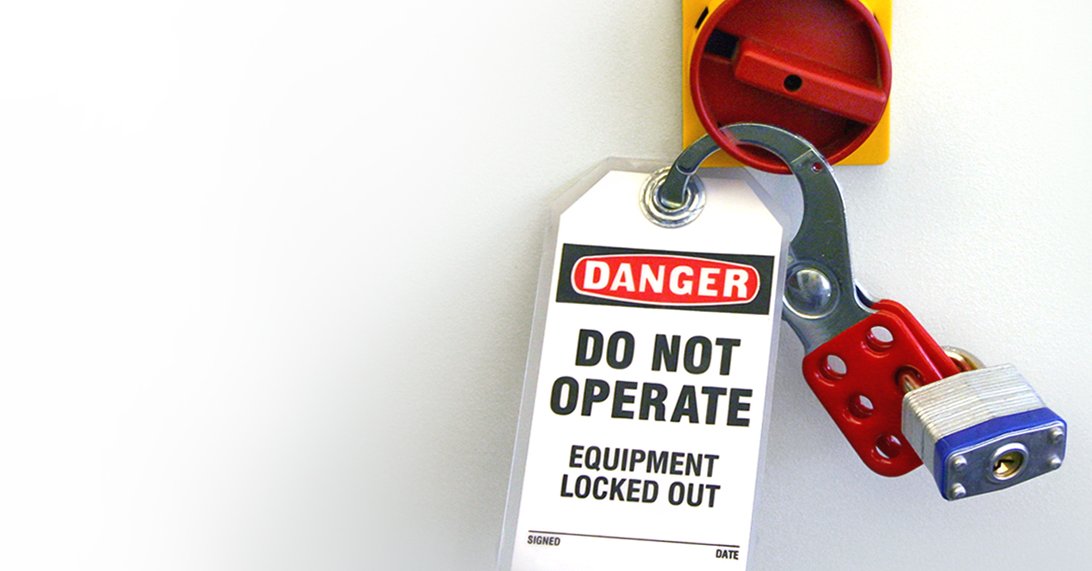
#### 1. Device-Specific Lockout Photos These show exactly how to isolate a particular machine. For example, a photo of a hydraulic press with locks on the main disconnect, isolation of hydraulic lines, and a tag indicating “Do Not Operate – Maintenance in Progress” leaves no room for interpretation.
Pro Tip: Take photos from multiple angles—front, side, and close-ups of locking points—to ensure clarity.
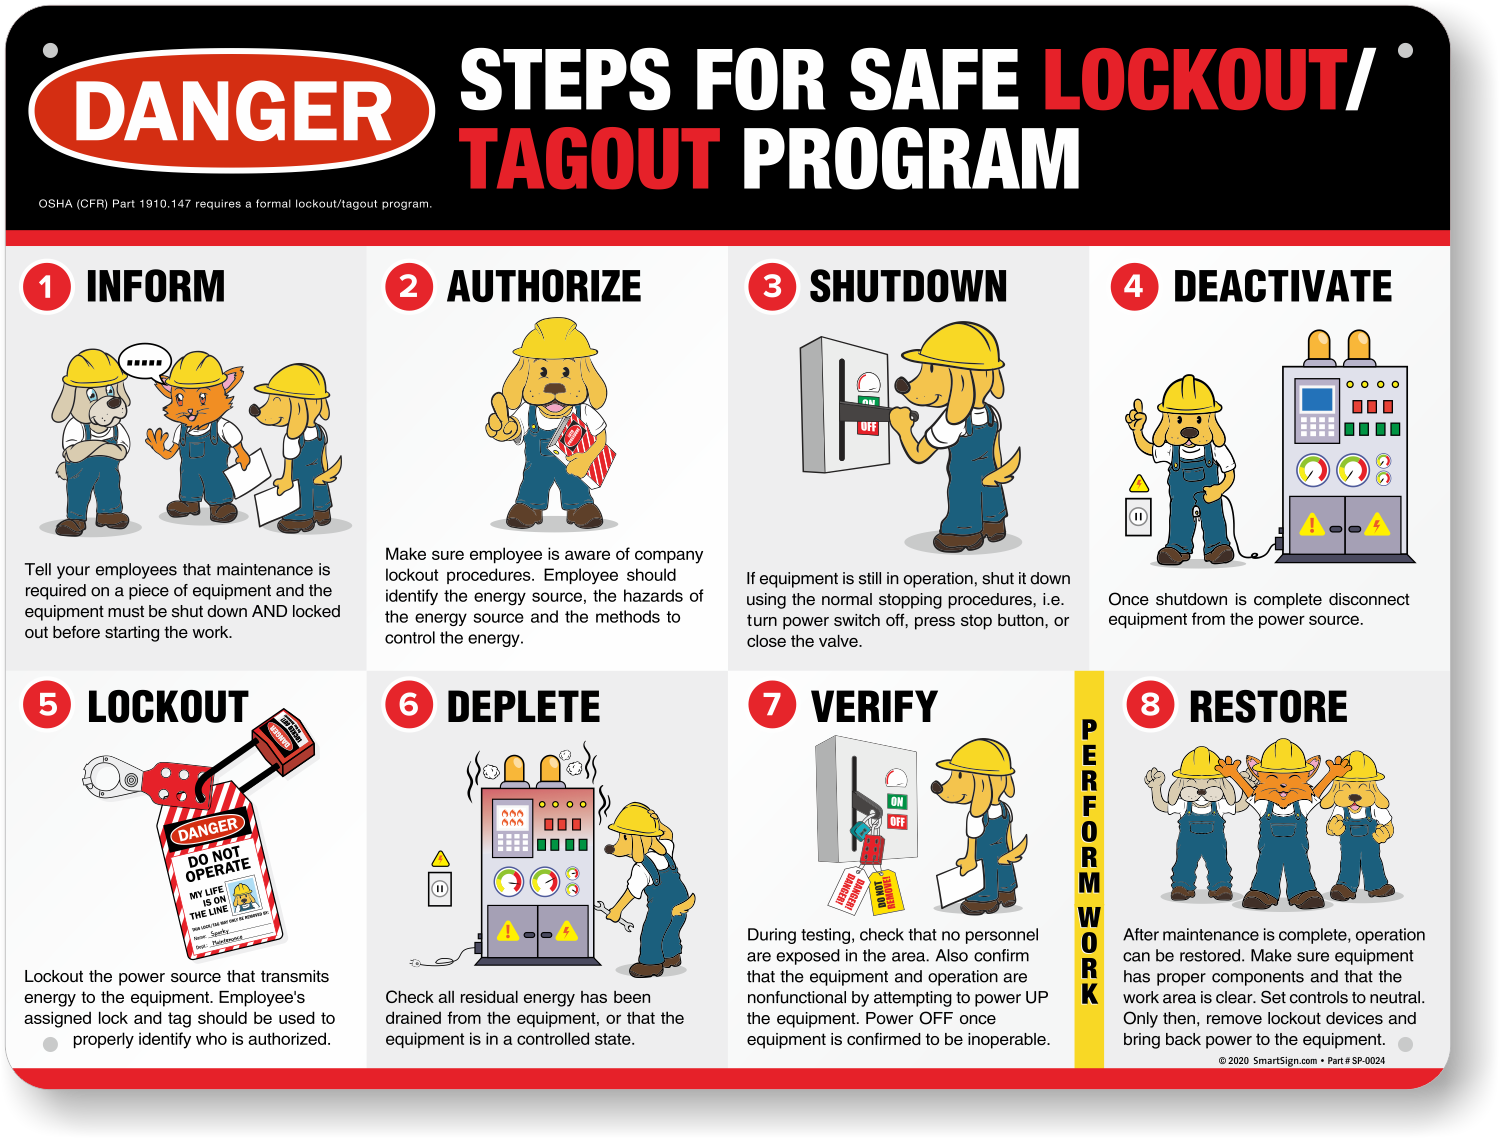
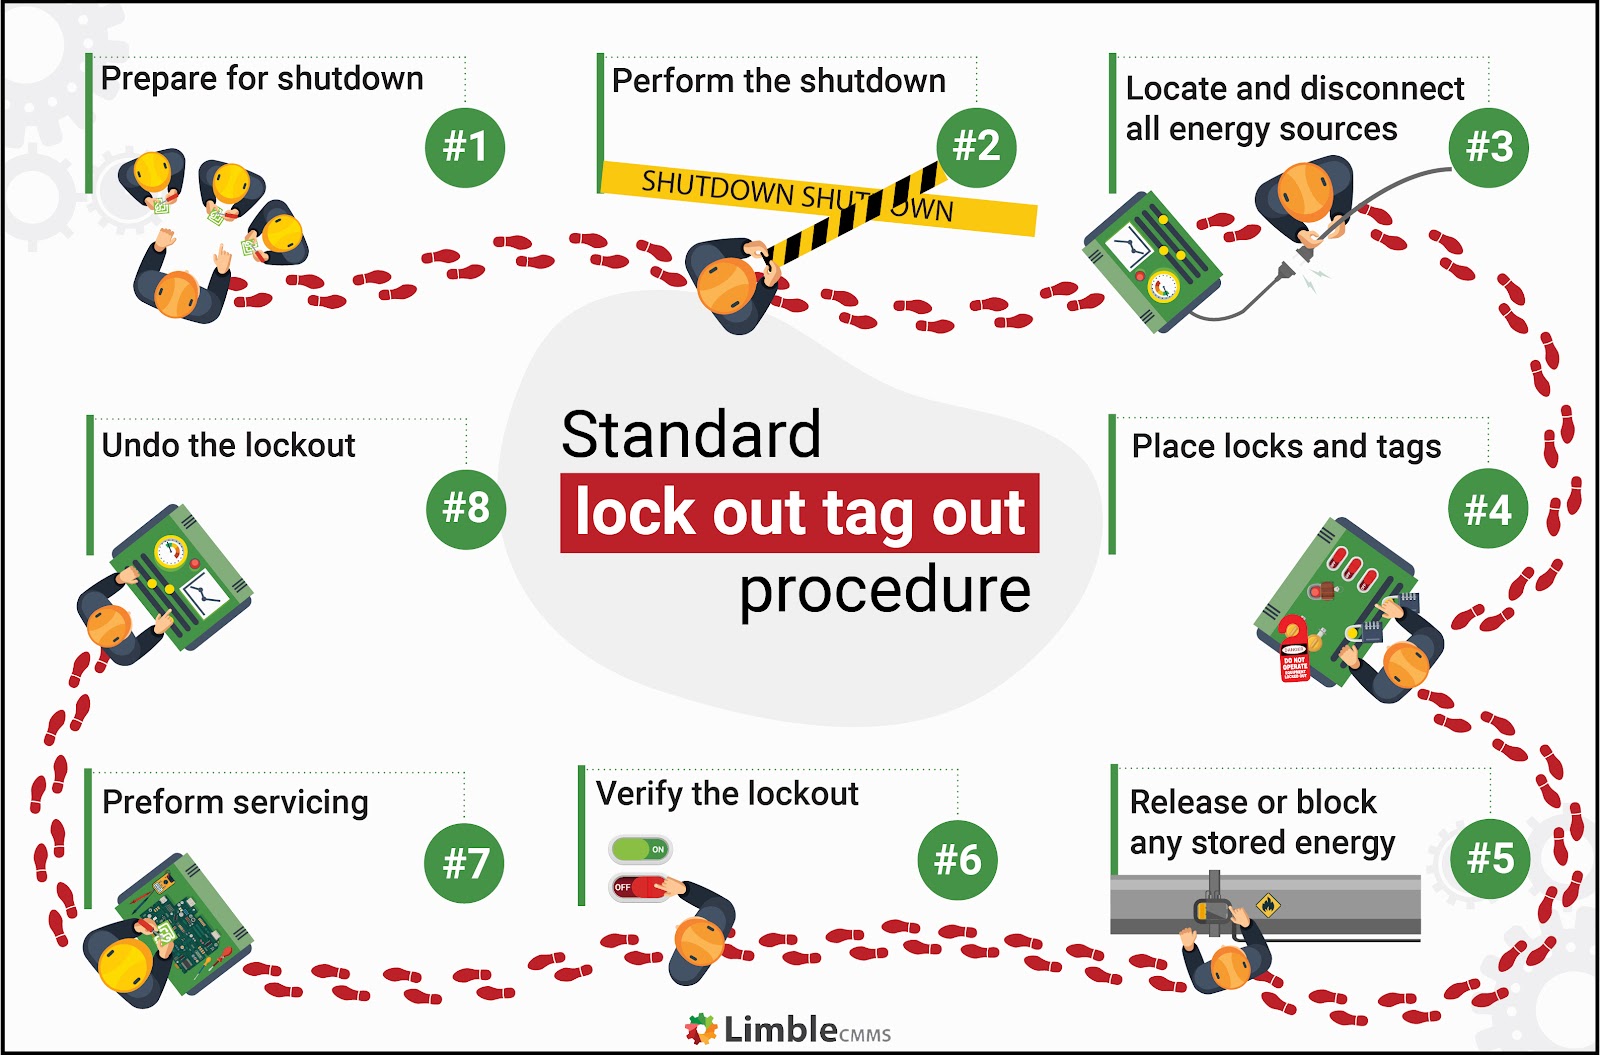
#### 2. Step-by-Step Procedure Visuals Break down the full LOTO sequence into annotated images: - Step 1: Machine shutdown - Step 2: Identification of energy sources - Step 3: Application of lockout devices - Step 4: Release of stored energy - Step 5: Verification of isolation
Each step paired with a photo creates a visual workflow that’s easy to follow under pressure.
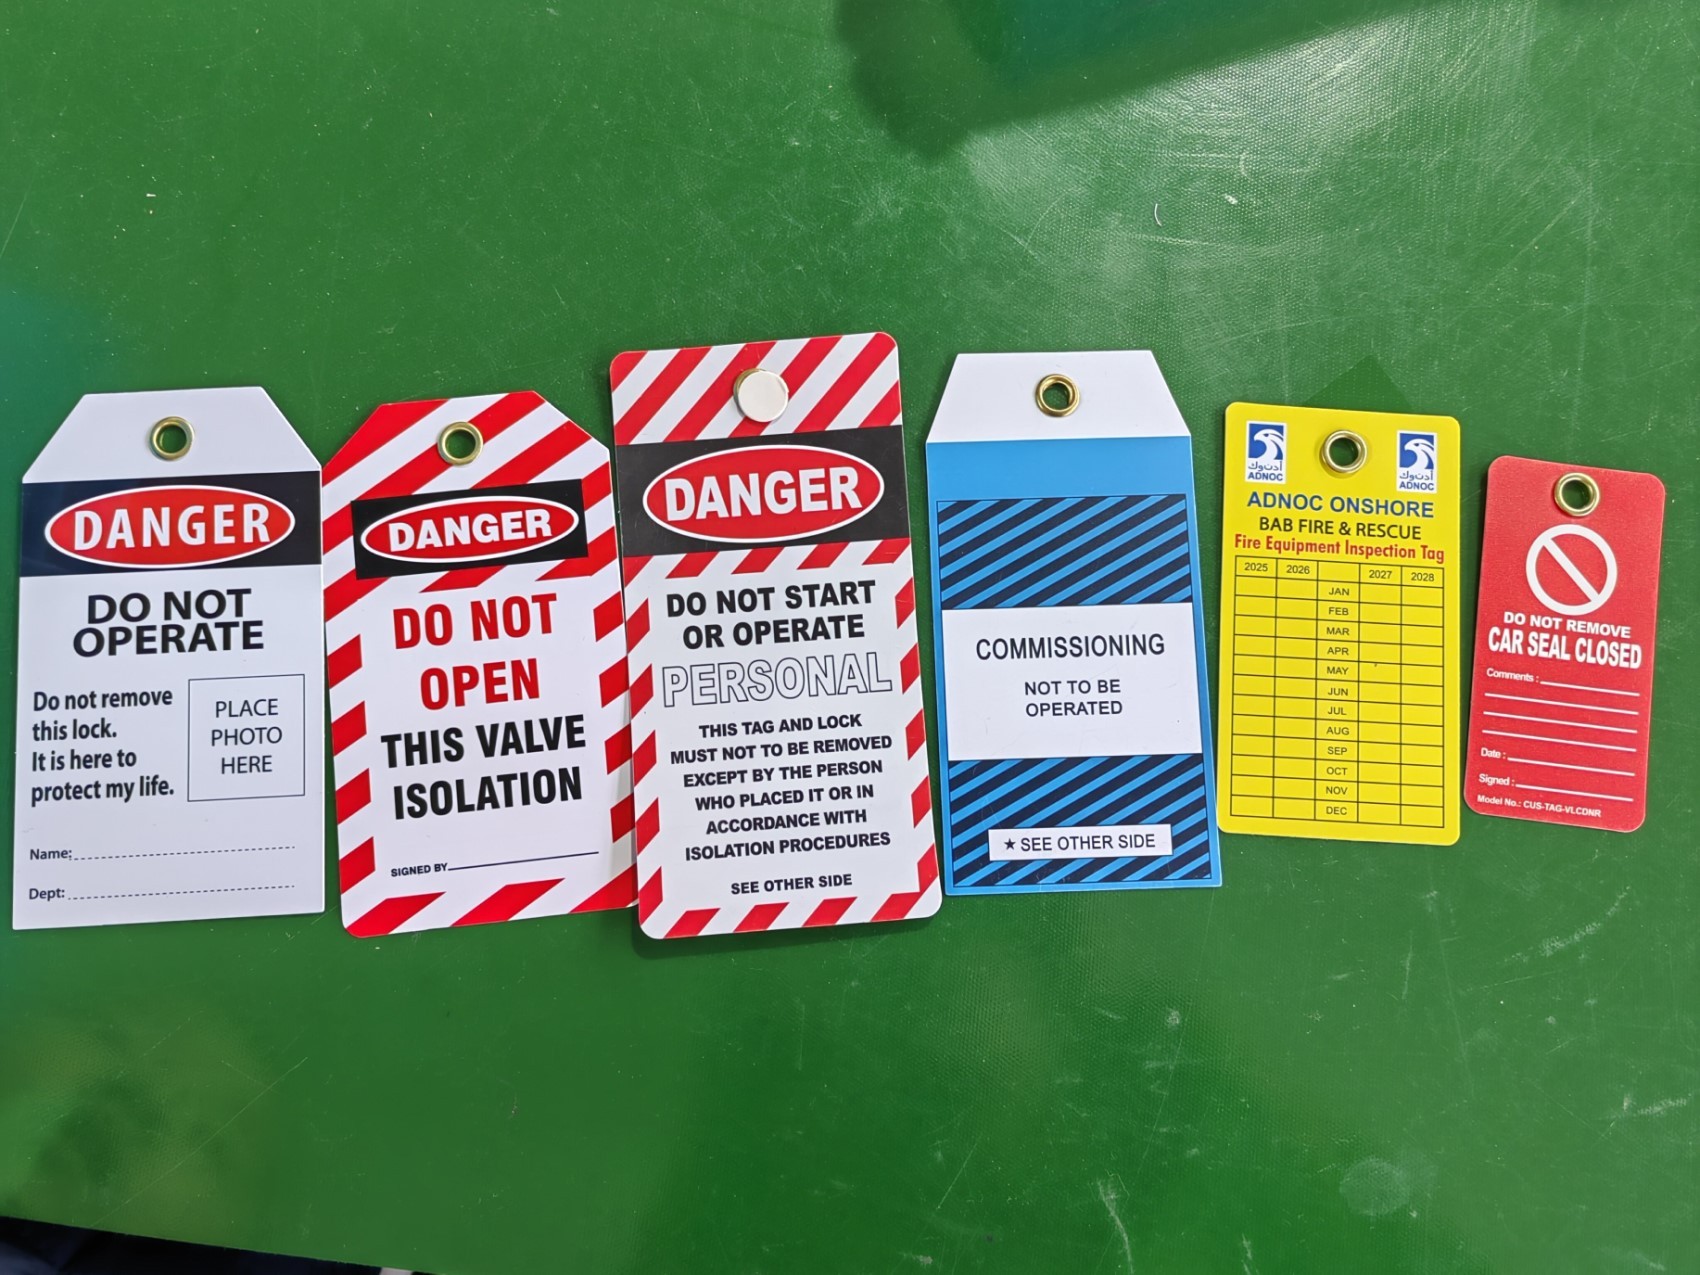
#### 3. Common Mistakes Shown Visually Sometimes, showing what not to do is just as important. Side-by-side photos of correct vs. incorrect lockout applications help reinforce standards. For instance: - A lock placed on a control valve instead of the main disconnect - A tag without a name, date, or reason - Multiple locks grouped haphazardly on a hasp
These visuals become powerful tools in safety meetings and refresher training.
#### 4. Site-Specific Examples A food processing plant has different lockout needs than a mining operation. Photos that reflect your actual equipment, layout, and environment are far more effective than generic stock images. Use them in your written energy control program to ensure relevance.
#### 5. Before-and-After Isolation Shots Show the machine in normal operation, then in a fully isolated state. This contrast helps workers understand the transformation required during lockout and confirms what “safe” looks like.
How to Use LOTO Images in Training and Documentation
A picture may be worth a thousand words, but only if it’s used correctly.
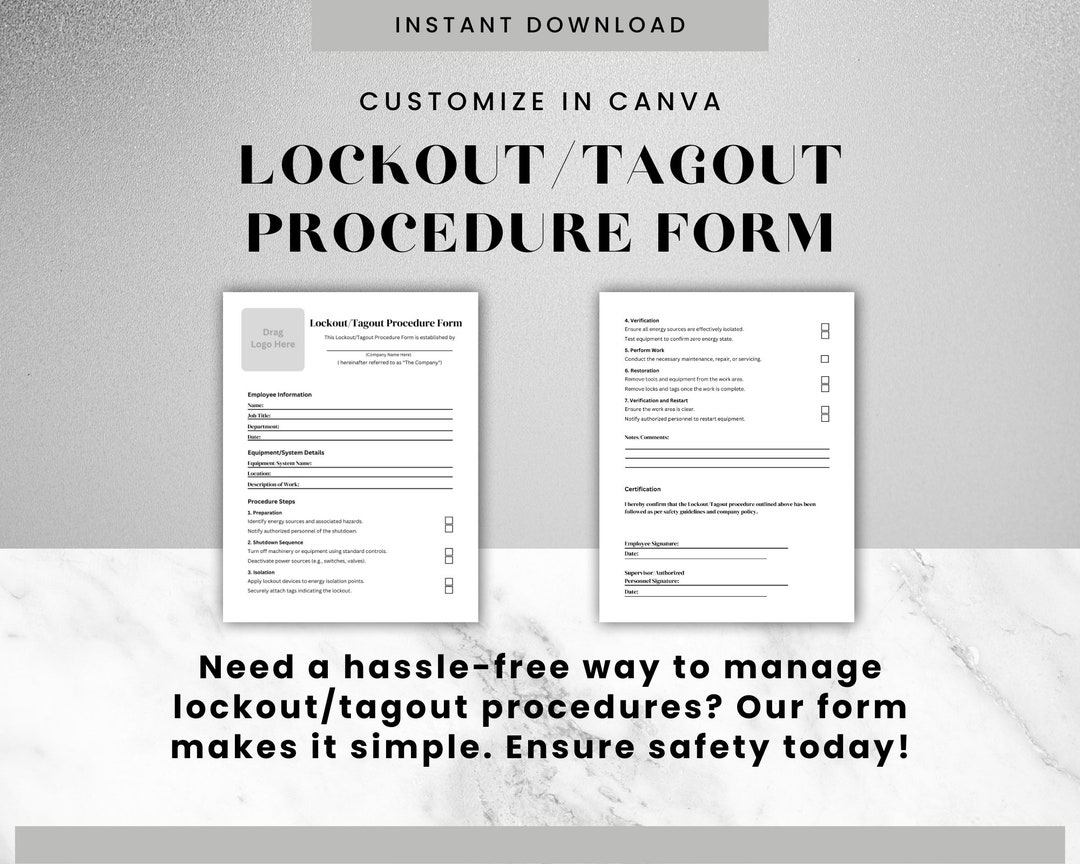
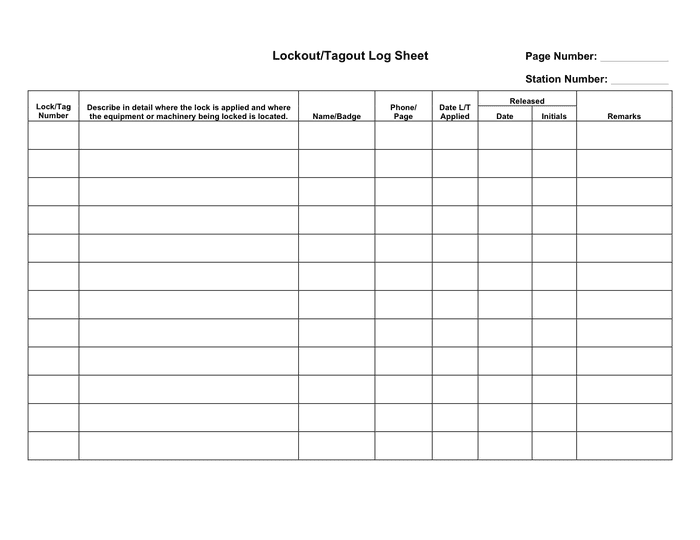
#### Integrate Into Written Energy Control Procedures OSHA 29 CFR 1910.147 requires that each employer have a written LOTO program. Supplement each procedure with photos. For example: > Machine: CNC Lathe, Model XYZ-200 > Energy Sources: Electrical (480V), hydraulic, rotational > Isolation Steps: > 1. Turn off main power switch (Photo A) > 2. Lock out disconnect at electrical panel (Photo B) > 3. Close and lock hydraulic isolation valve (Photo C) > 4. Apply personal lock and tag (Photo D)
This approach makes compliance tangible.
#### Use in New Hire Onboarding New employees often struggle with site-specific jargon and equipment. A visual guide acts as a universal translator. Pair LOTO photos with QR codes posted near machinery—scan for instant access to isolation instructions.
#### Support Internal Audits During safety audits, use your photo library to verify that real-world practices match documented procedures. If a technician is locking out a pump differently than shown in the official image, that’s a red flag requiring immediate review.
#### Reinforce Safety Culture Display high-quality LOTO photos in break rooms, near control panels, or in digital safety bulletins. When workers see consistent visuals, they internalize the standards.
Common Pitfalls in LOTO Photography (And How to Avoid Them)
Even with good intentions, teams often make mistakes when capturing lockout images.
#### ❌ Using Outdated Equipment in Photos If your facility upgrades machinery, old photos become misleading. Review and update visual documentation during equipment changes or annual audits.
#### ❌ Poor Lighting or Blurry Images A grainy photo of a tag with unreadable text defeats the purpose. Use a decent camera or smartphone with flash, and ensure tags and locks are clearly visible.
#### ❌ Generic Stock Images A photo of a lock on a random valve from an online library doesn’t reflect your workflow. Workers may ignore it as irrelevant. Always use real, site-specific images.
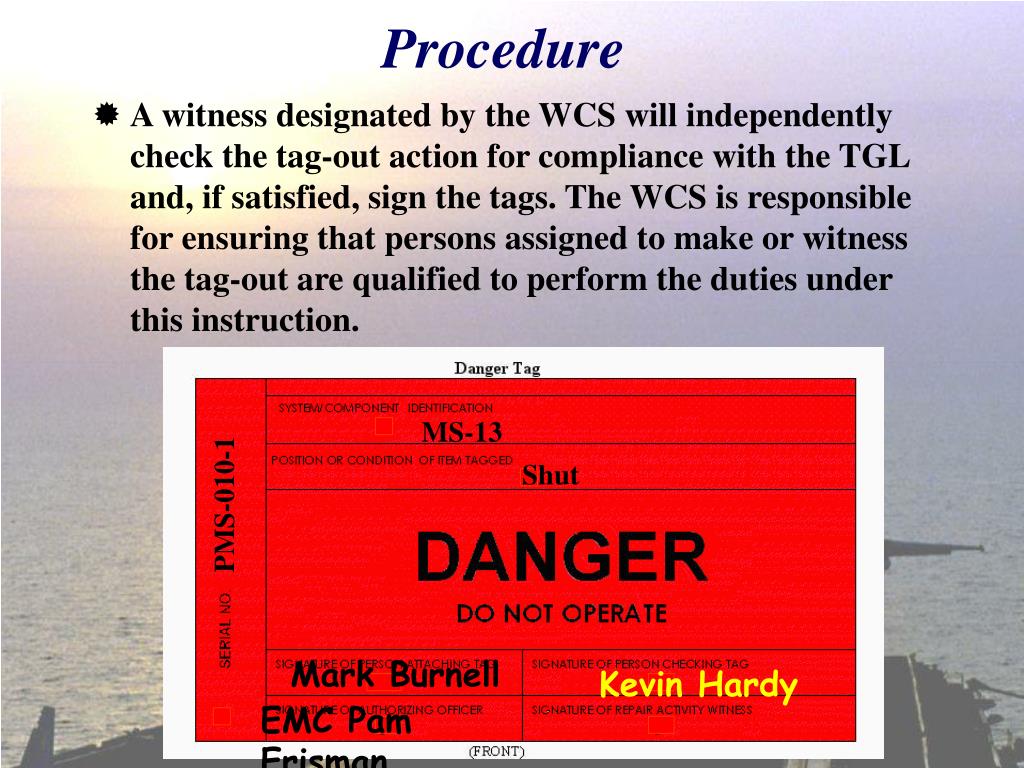
#### ❌ Missing Critical Details Zoom in. Show the tag’s information: who applied it, when, and why. Capture the full isolation point—not just the lock, but the valve, disconnect, or energy-dissipation mechanism.
#### ❌ Not Including Verification Steps One of the most overlooked phases in LOTO is verification. Take a photo of a technician pressing the start button (with zero response) to confirm the machine is de-energized. This visual proof strengthens accountability.
Top 5 Uses of Lockout Tagout Images in Real Facilities
- Lockout Procedure Boards
- Mount laminated photos near high-risk equipment. Include step-by-step visuals and emergency contacts.
- Digital Work Instructions
- Upload LOTO images to tablets or mobile apps used by maintenance teams. Update them centrally when procedures change.
- Safety Training Modules
- Use annotated photos in PowerPoint, e-learning courses, or toolbox talks. Include quizzes like “Spot the Mistake” using flawed LOTO images.
- Compliance Binders
- Print and organize photos by machine type or department. Auditors can cross-reference them with written procedures.
- Incident Investigations
- After a near-miss or injury related to energy control, compare what happened with the correct visual procedure. Identify gaps in understanding or execution.
What to Include in Every Lockout Tagout Photo
To maximize effectiveness, every LOTO image should contain these elements:
| Element | Why It Matters |
|---|---|
| Clear view of lock and tag placement | Confirms correct application point |
| Legible tag information | Shows authorized employee, date, and purpose |
| All energy sources accounted for | Visual proof of comprehensive isolation |
| Tools or testers in use (e.g., voltage tester) | Demonstrates verification step |
| Worker PPE (if applicable) | Reinforces safety culture and protocol |
Leave nothing to interpretation. If the photo doesn’t show why the machine is safe, it’s not doing its job.
Building Your Own LOTO Visual Library: A Step-by-Step Approach
Creating a reliable photo repository doesn’t require a professional photographer—just consistency and attention to detail.
- Identify High-Risk Equipment
- Start with machines involved in past incidents or complex energy systems.
- Develop a Photo Standard
- Define angles, lighting, and required elements (e.g., close-up of tag, wide shot of machine).
- Capture All Isolation Points
- Photograph each lock location and corresponding energy control device.
- Annotate and Label
- Add captions or digital overlays explaining each component.
- Review and Approve
- Have safety officers and maintenance leads verify accuracy.
- Store and Distribute
- Host images in a central, accessible location—on the intranet, in binders, or on shop floor displays.
Update photos annually or after any procedural change.
Final Thoughts: Make Safety Visible
Pictures of lockout tagout are more than training aids—they’re frontline defenses against preventable injuries. When a worker can look at a photo and say, “Yes, that’s exactly how I lock out this press,” you’ve bridged the gap between policy and practice.
Don’t rely on memory or vague instructions. Build a visual LOTO system that’s specific, accurate, and always accessible. Train with it, audit with it, and improve with it. Because in the world of industrial safety, clarity isn’t just helpful—it’s lifesaving.
Start today: pick one machine, take five clear photos of its lockout process, and share them with your team. That small step could prevent a major incident tomorrow.
FAQ
What should a proper lockout tagout photo include? A clear view of all locks and tags, legible tag information (name, date, reason), isolation points, and verification steps like testing for zero energy.
Can I use stock photos for LOTO training? Only as supplements. Always prioritize site-specific images that reflect your actual equipment and procedures.
How often should LOTO photos be updated? At least annually, or immediately after equipment changes, procedural updates, or incidents.
Who should take lockout tagout pictures? Trained safety personnel or maintenance leads familiar with LOTO protocols and photography basics.
Are digital LOTO images acceptable for OSHA compliance? Yes, as long as they’re accessible, accurate, and part of your written energy control program.
Can photos replace written LOTO procedures? No. Visuals support but don’t replace written documentation. OSHA requires both.
How can I share LOTO images with remote teams? Use secure intranet portals, mobile safety apps, or cloud-based platforms with controlled access.
FAQ
What should you look for in Pictures of Lockout Tagout: Visual Guide for Safety Compliance? Focus on relevance, practical value, and how well the solution matches real user intent.
Is Pictures of Lockout Tagout: Visual Guide for Safety Compliance suitable for beginners? That depends on the workflow, but a clear step-by-step approach usually makes it easier to start.
How do you compare options around Pictures of Lockout Tagout: Visual Guide for Safety Compliance? Compare features, trust signals, limitations, pricing, and ease of implementation.
What mistakes should you avoid? Avoid generic choices, weak validation, and decisions based only on marketing claims.
What is the next best step? Shortlist the most relevant options, validate them quickly, and refine from real-world results.